If your store can only host one event during a specific period of time, such
as a large party in the evening or a large group booking on a Saturday afternoon,
you can block off that period of time in the calendar for the event so that
no other listings have availability.
|
3.
|
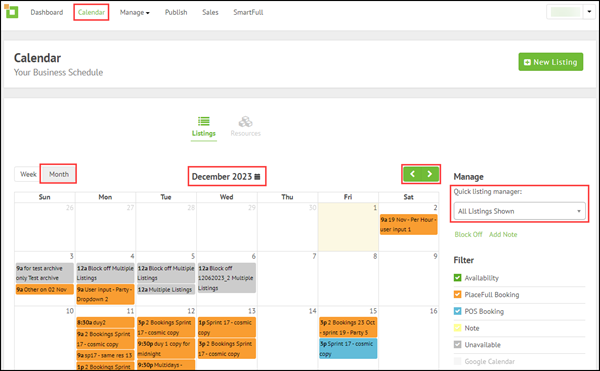
Use the navigation options to go to the month of the event. |
|
4.
|
In the panel to the right of the calendar, from the
Quick listing manager drop-down, select
All Listings Shown.
|
|
5.
|
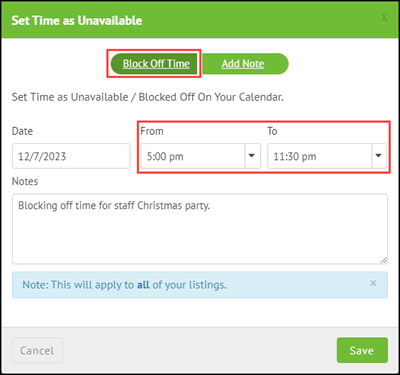
Click anywhere on the date of the event. The
Set Time as Unavailable dialog displays.
|
|
6.
|
Select Block Off Time.
|
|
7.
|
The Date is automatically selected. Use the
From and To fields to select
the period of time that you would like to block off for the event
on that date.
|
|
8.
|
(Optional) In the Notes text box, enter any
notes related to the blocked off period of time, such as the
event name.
|
This period of time is now blocked off for all listings - including the event
that you want to hold during that time! You now need to remove this block
for the event that you want to hold during that time.
|
10.
|
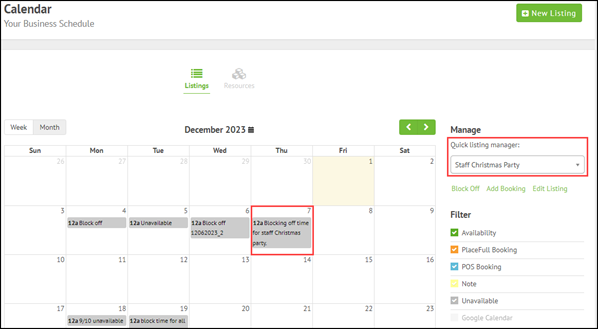
In the panel to the right of the calendar, from the
Quick listing manager drop-down, select the
event that you want to hold during the blocked off period of
time.
|
|
11.
|
In the calendar, click the gray box that was
added when you blocked off the date and period of time. The
Edit Existing Unavailable Time dialog displays.
|
|
12.
|
Click Delete. (The button is grayed out until
you hover your mouse over it.)
|
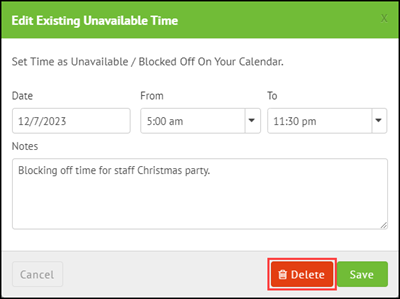
The gray box will disappear from the calendar. This is because the block
has been removed for the event. The block remains for all other listings.
Video tutorials

Comments
0 comments
Please sign in to leave a comment.